 In this tutorial we’ll add properly-rotated labels to our Tutorial 2 sunburst. This will require us to update a few lines of existing code and add a new rotation function.
Just want the code? Or an overveiw of the tutorials?
I hope this tutorial helps you deepen your d3 visualization skills. If it does that, or if you have an idea about how to improve something below, let me know in the comments section. Do good!
—David Richards
Tutorial Contents
Summary
In this tutorial, we move from a plain sunburst, to one that has labels. (Tips: Keep the raw code open in a separate tab. Do a code compare between tutorial 1 and 2.)
| Old: Data from a JSON file | New: Now we have labels | |
Just the Code
The tl;dr version of this tutorial (in 4 easy steps):
- Replace this old line of code with two new lines of code:
// Old code:
var vSlices = g.selectAll('path').data(vNodes).enter().append('path');

// New code:
var vSlices = g.selectAll('g').data(vNodes).enter().append('g');
- Append a path element to our g elements:
// Old code:
vSlices.
    .attr('display', function (d) { return d.depth ? null : 'none'; })

// New code:
vSlices.append('path')
    .attr('display', function (d) { return d.depth ? null : 'none'; })
- Add a new block at the end of
drawSunburst()that appends our labels:
vSlices.append('text')
    .filter(function(d) { return d.parent; })
    .attr('transform', function(d) {
        return 'translate(' + vArc.centroid(d) + ')rotate(' + computeTextRotation(d) + ')'; })
    .attr('dx', '-20')
    .attr('dy', '.5em')
    .text(function(d) { return d.data.id });
- Insert this function (outside of the
drawSunburst()function) that calculates the proper rotation of the labels:
function computeTextRotation(d) {
    var angle = (d.x0 + d.x1) / Math.PI * 90;

    // Avoid upside-down labels; labels as rims
    return (angle < 120 || angle > 270) ? angle : angle + 180;
    //return (angle < 180) ? angle - 90 : angle + 90;  // labels as spokes
}
All of the juicy details about what and why are below.
Use g Instead of path
Beginning in our Layout code block, we append a “container” <g> element for each node in our data (previously we’d appended <path> elements). Then we’ll stash our path elements with the g elements.
// Old code: Append sunburst <path> elements
var vSlices = g.selectAll('path').data(vNodes).enter().append('path');

// New code: Append sunburst <g> elements
var vSlices = g.selectAll('g').data(vNodes).enter().append('g');
In the previous tutorial, we selected our non-existent <path> elements below and used the d3 Update Pattern to add a <path> for each node in our data. The problem is that we cannot attach a <text> element to path. So instead of beginning with the
Our updated vSlices variable now represents a list of all of our slices as
// Old code: vSlices are <path>s, so we work on them directly
vSlices.
    .attr('display', function (d) { return d.depth ? null : 'none'; })

// New code: vSlices are <g>s, so we append <path> first
vSlices.append('path')
    .attr('display', function (d) { return d.depth ? null : 'none'; })
    // everything else in this block remains the same
With these changes, the code now produces html that looks like this:
<g>
    <path d="..." style="..."></path>
</g>
The other lines of this block remains the same as Tutorial 1.
Add Labels
Now we add our labels to each of the g elements that we created above. Then we rotate and position them properly.
vSlices.append('text')  // <--1
    .filter(function(d) { return d.parent; })  // <--2
    .attr('transform', function(d) {  // <--3
        return 'translate(' + vArc.centroid(d) + ')rotate(' + computeTextRotation(d) + ')'; })
    .attr('dx', '-20')  // <--4
    .attr('dy', '.5em')  // <--5
    .text(function(d) { return d.data.id });  // <--6
Now we’ll add and populate the <text> elements with our data-driven titles.
-
vSlices.append("text")like the last block, starts with the variables that we created above that points to all of our node-basedelements. Then We append an empty ` ` element to each ` ` element. -
As with our
statements, we filter out the root node (since, for our purposes, we don't want text there). .attr("transform", function(d) { return ...; })adds a transform attribute to each our newly created<text>elements."translate(" + arc.centroid(d) + ")"moves the reference point for this<text>element to the center of each arc (the variable we defined above). The centroid command from d3 computes the midpoint [x, y] of each arc."rotate(" + computeTextRotation(d) + ")"then we’ll rotate our<text>element a specified number of degrees. We’ll do that calc in a separate function below.
-
.attr("dx", "-20")// Moves the text element to the left, which makes our labels look centered. -
.attr("dy", ".5em")// Pulls our text element in closer to the center of the Sunburst, which makes our labels look centered. .text(function(d) { return d.parent ? d.data.name : "" })returns the “name” attribute for each node, unless that particular node has no parents (the “root” node). In that case, it returns an empty string.- This
d.parentcheck is an alternative to thed.depthcheck that we did in Tutorial 1 for finding our root node.
- This
Putting this block all together, each data node has an entry that looks like:
<g>
<path d="..." style="..."></path>
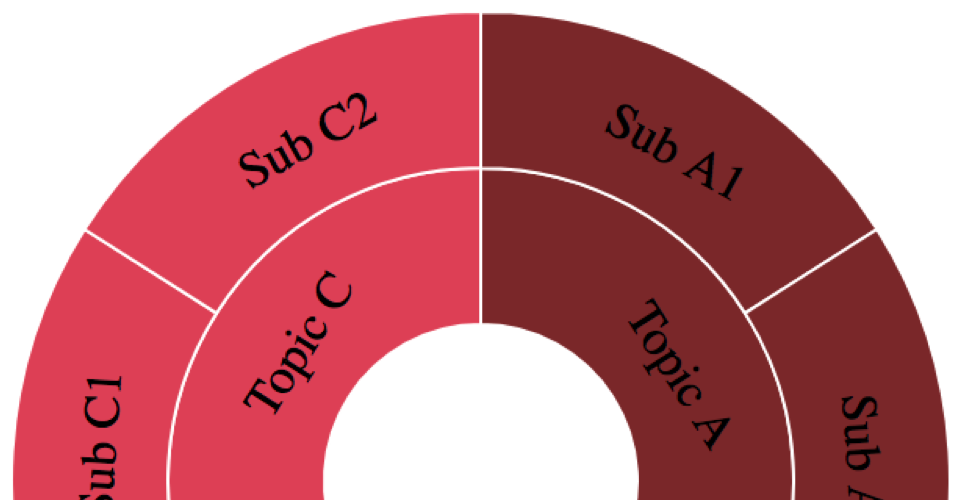
<text transform="translate(105.54,-66.97)rotate(-32.39)"
dx="-20" dy=".35em">Topic A</text>
</g>
This is the end of changes to our drawSunburst() function.
computeTextRotation Function
The computeTextRotation function calculates the correct amount of rotation for each label based on its location in the sunburst. It also avoids upside down labels. It takes a single argument, “d”, which represents a single d3 node (this function is called one time for each text element).
function computeTextRotation(d) {
    var angle = (d.x0 + d.x1) / Math.PI * 90;  // <-- 1

    // Avoid upside-down labels; labels aligned with slices
    return (angle < 90 || angle > 270) ? angle : angle + 180;  // <--2

    // Alternate label formatting; labels as spokes
    //return (angle < 180) ? angle - 90 : angle + 90;  // <-- 3
}
Three math-rich lines in this function:
var angle = (d.x0 + d.x1) / Math.PI * 90calculate the angle (in degrees) of the label. However, it’ll draw 1/2 of the labels upside down.- d.x0 = the beginning angle of this node / slice (in radians).
- d.x1 = the end angle of this node / slice (in radians).
-
return (angle < 90 || angle > 270) ? angle : angle + 180handles rotation to avoid any upside-down labels: If rotation angle is in the 1st or 2nd quadrants (top 1/2), leave the already calc’d angle. Otherwise, flip the text over so that the text appears right-side-up. return (angle < 180) ? angle - 90 : angle + 90Alternatively, this line rotates the labels so that they appear in the traditional “spoke” formation. And it avoids any upside-down labels. It’s currently commented out.
Very good! You’ve made it through 3 tutorials. Stick with it.
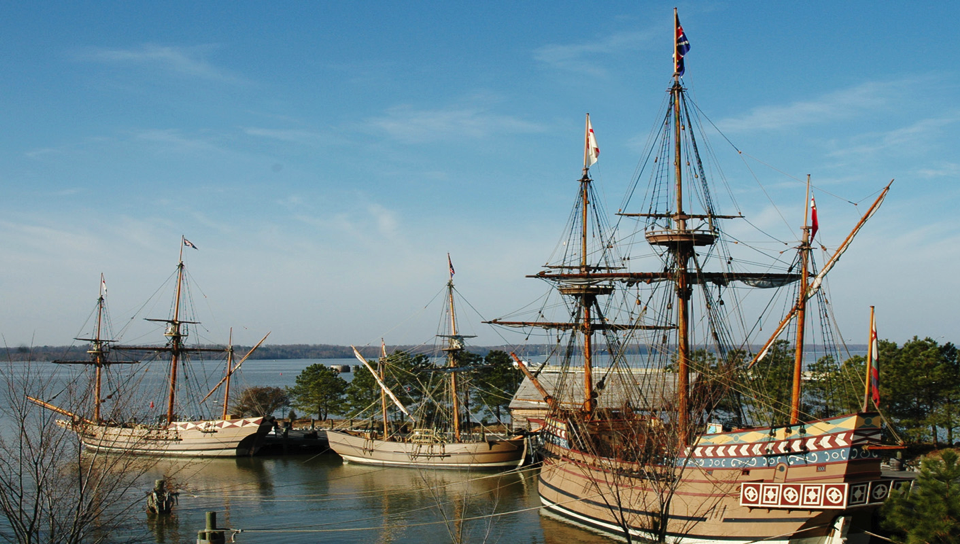
In December 1606, 144 people set sail for a 4-month, cross-Atlantic trip from London to Virginia. One of my boys and I visited the Jamestown settlement and the recreations of the ships that carried the explorers: Susan Constant, Godspeed, & Discovery.